
Internet
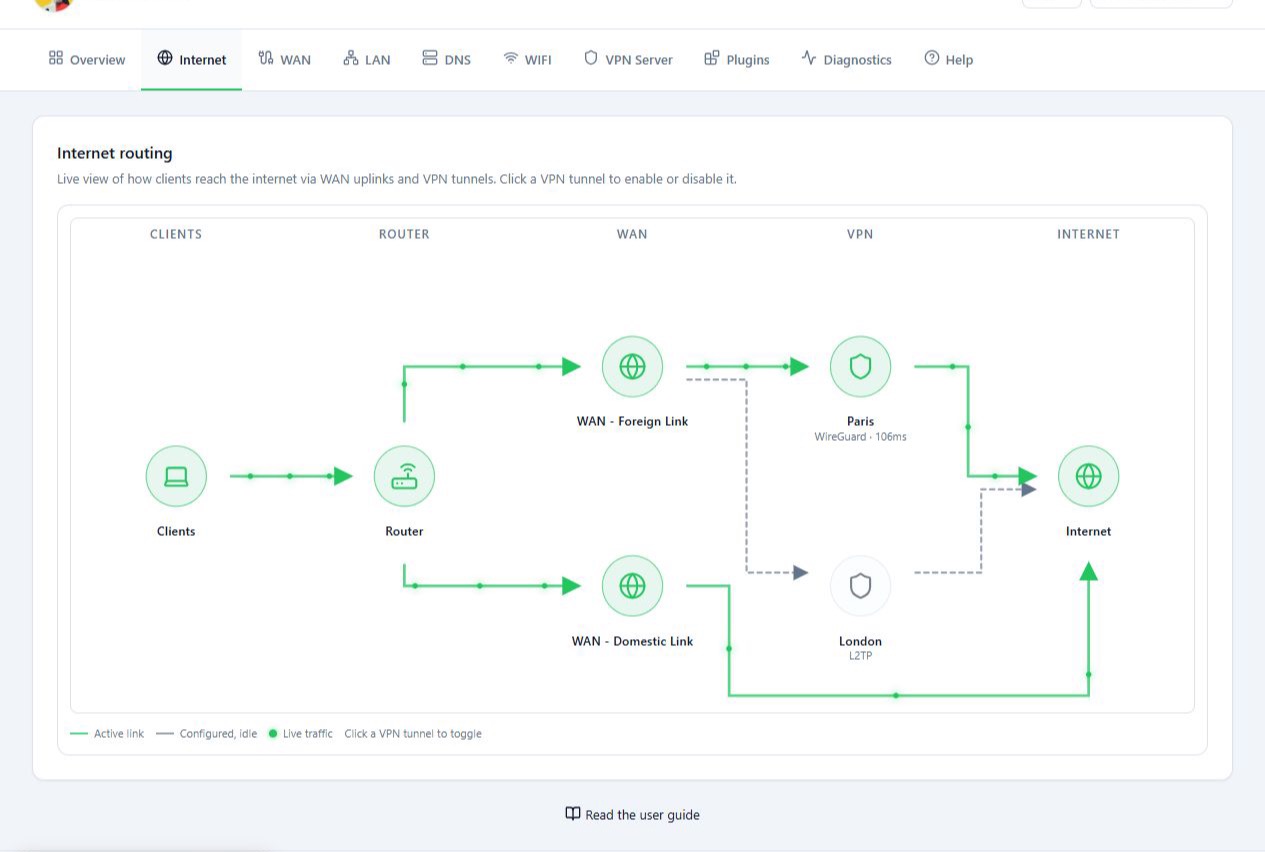
A diagram of how devices reach the internet through the WAN links and outbound VPNs, with a switch for each VPN route.
Overview
The Internet routing page draws the path from your devices to the internet: from the devices on the network to the router, then the WAN links, the outbound VPN and finally the internet. The diagram updates as the connections change.
This tab is mainly for seeing the routes and switching them on or off. To set a VPN’s server address or login details, go to the WAN tab.
Before you start
- The initial setup with Easy Config must be finished. Until then there are no routes to show.
- Only VPN routes can be switched on or off from this page. The rest of the diagram is view only.
Steps
Turn a VPN route on or off
- Click the VPN in the diagram.
- In the window that opens, check the Active state.
- Pick the state you want and click Save.
- Check the route shown and the VPN status again.
This change can affect how devices connect. If you have several VPNs and want a specific one to be the Starlink exit, also check the Starlink gateway state on the WAN tab.
Reference
| Diagram key | Meaning |
|---|---|
| Active link | The active connection. Current traffic goes this way. |
| Configured, idle | A defined connection that is not active right now. |
| Live traffic | Traffic flowing along the route. |
Troubleshooting
“No routing topology configured for this router yet.” appears. There are no routes to show yet. Finish Easy Config first.
The internet or a VPN dropped but the diagram has not changed. Wait a few moments for the new status to arrive.
“Not supported yet” appears after clicking the diagram. You clicked something that is not a VPN route. Only VPN routes can be changed from this page.
“Failed to load Internet topology” appears. The panel could not read the route status from the router. Check your connection to the router.