
VPN Server
The wizard's optional fifth step, where you create an OpenVPN server and its first account for connecting from outside the network.
Overview
In Dual-Link mode, the VPN Server step sets up OpenVPN and creates its first user account. This is for connecting devices to the MikroTik from outside the network.
If you do not need it yet, leave it Disabled. You can set it up later from the VPN Server tab.
In Starlink-Only mode this step is not shown. Apply the settings on the last step the panel shows you.
Before you start
- You chose Dual-Link mode.
- Decide on a certificate passphrase. You will need it again when you import the config on a device.
- Decide on the first VPN account’s username and password.
Steps
- Turn VPN Server on.
- In Certificate passphrase, set the passphrase for the connection certificate, following the form’s rules.
- Enter the VPN account’s username and password in Username and Password.
- Check the details and press Apply.
The certificate passphrase is not the account password. You need both to connect with OpenVPN.
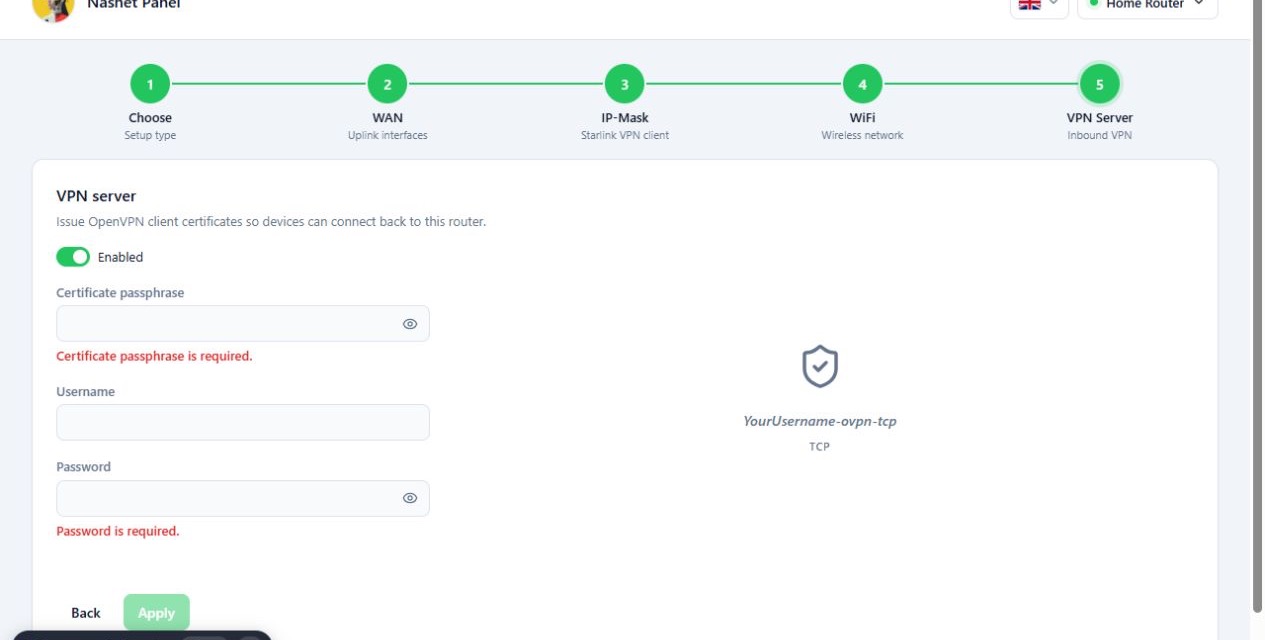
Creating the server is not enough on its own to connect from outside. The Public IP and port forwarding requirements are covered on the VPN Server page.
Reference
| Field | What it does | Default |
|---|---|---|
| Enable switch | Creates an OpenVPN server on the router. | Disabled |
| Certificate passphrase | Protects the connection certificates. Required when enabled. | empty |
| Username | Name of the first VPN user. Required when enabled. | empty |
| Password | That user’s password. Required when enabled. | empty |
Troubleshooting
Certificate passphrase is required. VPN Server is on but the passphrase
is empty.
Username is required. or Password is required. Fill in the first
user’s details, or turn VPN Server off if you do not need it.
The step is missing from the wizard. You chose Starlink-Only in the first step. If you need a VPN server, go Back to the first step and choose Dual-Link.